
| Edificio Tools & Menus |
The various options and buttons on the menu toolbar are covered in this section. You may click on the buttons above to go to the section covering their functions, or alternately the different topics are listed below in alphabetical order:
| The File Menu does not allow you to import new buildings or facilities. This is done in the facility menu. This menu simply allows you to close the window or save your project. The save can also be accomplished by using the save button (pictured at left) |
Cut/Copy/Paste
The edit menu is full of useful tools. The first group of options revolve around manipulating critical components. See the help section on working with critical components for more information.
The second group of options have to deal with manipulating the views of the buildings. The first of these is the 'Rotate Building' option. This tool can be used in tandem with the flip tool to position the building in just about any fashion. Before using the rotate option, you must first select the building you desire to rotate by selecting it with a left click of the mouse. The 'Rotate Building' allows you to rotate in preset values of 90, 180, and 270. Choosing to rotate by 'X degrees' will bring up a dialog box where you may input any positive value from 1 to 360. There is also an option for clock-wise or counter-clockwise rotation in this dialog box. |
The rotate button (pictured above) can also be used for quick 45 degree rotations in the clockwise direction of whatever building is currently selected.
Show/Hide Grid
Edificio's grid is the gray graph-paper-like set of lines which appear under the buildings to aid the user in determining positions on the canvas. The program starts by default with the grid showing. The grid makes it easier to map the ruler values to a given point on the canvas. However, you can toggle this grid on and off as it suits you through this menu option.
| This tool can be useful if you have created a project which buildings who are so far from each other, that they do not always fit on the screen together, or if you have scrolled to an area on the edge of the project and wish to quickly scroll back to the center of the facility area. |
While this tool will not resize and zoom so all buildings are visible, it will take the view to the exact center point of the facility which is often a useful view. This tool is also available through the center button (shown at left).
Print Screen/Save Screen as JPEG
If you wish to get a snap shot of just your facility, this option will capture this in a JPEG image and prompt you as to where you would like to save this image. This will not save the entire facility however, just the presently viewed area, including the rulers and scroll bars. |
This option allows you to delete a building you have selected (see deleting buildings for more information).
| The clear screen option and the clear button (shown at left) will both allow you to remove all buildings from you project. A dialog box will ask you to confirm that this is your wish before actually removing them. These changes are not permanent until saved, |
| The change color option is available to help you distinguish buildings from each other or mark different buildings in a meaningful way for you. You must first select the building whose color you wish to change by left clicking on it. You may also change a building's display color by choosing a building and clicking on the color button (pictured at left). Both of these actions bring up the color dialog shown below. Simply click one of the small squares to change the color. | |
 |
 |
The facility menu lists all the currently saved facilities in your Library and UserFac directories in a drop down menu called 'type of building'. Any facilities you create will appear only after you have saved and exited Edificio. Usually this menu is accessed in order to bring new buildings into a project. You can see a snapshot of the overall building shape in the preview window after selecting each new building from the drop down menu. |
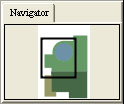 |
This panel allows you to quickly moved the main view to the area of the facility you need to view. When you place the mouse over the mini-view pictured here you will see a hand appear. Click with the hand to 'grab' the canvas and move it around as desired. The black box shows the current view. As you drag, the larger main view will change accordingly. Of course if you are currently viewing the entire facility, the navigator panel will not allow you to change the view as there is nothing more to see. |
This input box allows you to change the ground level for the entire facility. You may only do this when you are not in floor view. By changing this value, you will change the elevation values of all the buildings and components in the entire facility. If you wish to move a building or component relative to the ground, you must edit the sinkage value in the property table to change a building, or edit the elevation of a component in the component window to move components.
In order to see "inside" a building, you will need to use the floor level slider located on the left of the screen below the preview panel . Floors are hard coded into the building files. By default, all buildings show floor 'zero' (which is the overhead view of the building and not an actual floor) until you move the slider to another number. Choosing an actual floor will also update the property table to display the elevation for that floor. If there are any critical components in that building, choosing to view any floor will cause the critical components window to appear. Likewise, resetting the floor level to zero will hide this window. While you are viewing the floors of a building, you will not be able to select other buildings or delete them. If you wish to do this, you must first set the floor view of this building to zero.
The property table is where you will find useful information about basic characteristics of a building such as its name, type, current x/y position, the amount by which the building is sunk into the ground (sinkage), the elevation of the current floor view (if a floor is in view), and also the length and width of the building. Several of these fields are editable by the user.
The x and y locations can be manually changed by clicking on their values and entering in new numbers. The x/y location refers to the upper left hand corner of the building, as if the building were set on an imaginary square slab. This point may not actually be inside the building itself.
The sinkage can also be set by the user by clicking on its value and entering a new one. This will not affect the view on screen, but will affect the geometry of the exported model.
Elevation can also be changed if the building is currently in the over head view (floor zero).
| The zoom tool allows a user to both zoom in to a project for greater detail or to zoom out to get a broader view of how the buildings are positioned in the facility. By selecting this button, your cursor will transform into a magnifying glass. The zoom button icon will in turn become an arrow pointer. |
When you are finished with the zoom tool, simply click on the zoom button (which now displays an arrow pointer) and you will return to regular clicking.
While the zoom tool is enabled, any clicks outside the facility canvas area will still function as normal (i.e. you can save buildings, use the floor level slider, etc.), but clicking in the canvas will enact a zoom (unless you are at the max zoom level either in or out). A left-click will zoom in for greater detail, and a right-click will zoom out for less detail. Also, if there is room on the canvas, the zoom will attempt to center on the point where you clicked.
| |
The wall view tool allows a user to view all the walls in all the buildings. Since some of the buildings may have several floors, you may see an odd patchwork of walls in a building. If you desire a floor by floor view, try the floor view slider While in wall view, the selected building will not display its building color, but will be white instead. If the walls are very thin in the building, or if there are no walls, the building may seem to 'disappear'. If this happens, try deselecting the building |
| The flip button will flip any given selected building about the y axis of that building. Before using the flip tool, remember to select a building. The flip will, of course, affect all critical components in the building. You may flip while viewing floors or walls. |
| The create button brings up a new dialog window for you. The details about using the create building tools are found explained in the section on creating buildings. |